


Diamond Plate Vinyl Edge Trim Molding
Diamond Plate Vinyl Edge Trim Molding
Couldn't load pickup availability


- About This Item
- Product Video
- Product Data Sheet
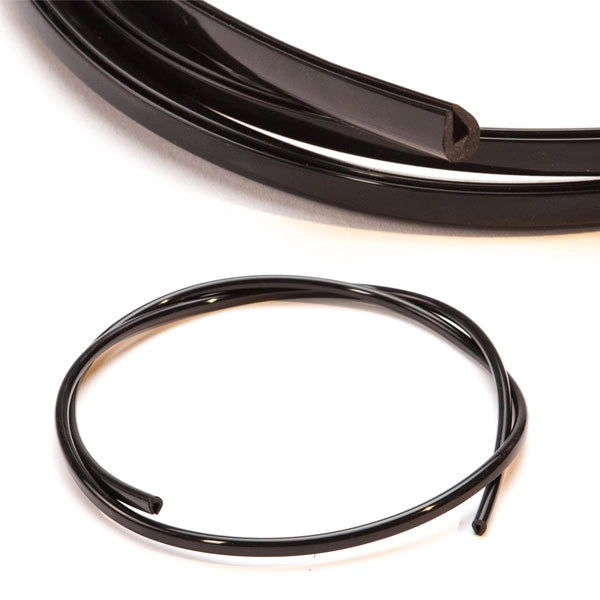
The Easiest Way to Finish Diamond Plate Panel Edges — No Tools Required
Every exposed edge of an aluminum diamond plate panel is a sharp edge. The Diamond Plate Vinyl Top Trim Molding solves that problem faster and more simply than any other trim option in our catalog. Press it onto the panel edge and you are done — no screws, no nails, no caulking gun, no drill. The self-adhesive U-channel grips the panel edge and stays put, leaving a clean, finished, safe edge that protects anyone who comes near the panel from contact with raw aluminum.
At 50 feet per roll, one purchase covers an entire room of wainscoting with minimal seams and no piecing together short lengths. It cuts in seconds with scissors, tin snips, or a utility knife. And because it is flexible vinyl — not rigid extruded aluminum — it follows curves and irregular surfaces that aluminum trim simply cannot handle.
Who This Trim Is For
The vinyl edge trim is the right choice when any of the following apply to your project:
- You are finishing a curved surface. Rigid aluminum J-trim cannot bend. This vinyl trim flexes to follow curved walls, rounded columns, wheel wells, trailer interiors, and any application where the panel edge is not a straight line.
- You want the fastest possible installation. No fasteners, no adhesive to apply separately — the adhesive is already inside the U-channel. Press and done.
- You want minimal visible seams. At 50 feet per roll, you cover significantly more linear footage per piece than individual aluminum trim lengths, meaning fewer joints and a cleaner continuous look.
- You need edge protection on a budget. The vinyl trim is the most economical edge finishing option in our catalog — and at 50 feet per roll, the cost per linear foot is the lowest of any trim profile we offer.
Where to Use It
The vinyl U-channel trim is designed to finish and protect any exposed panel edge — not just the top. Use it on:
- Top edges of wainscoting panels where the panel terminates below the ceiling or above a chair rail
- Bottom edges where the panel meets the floor or a baseboard
- Side edges where a panel terminates at a door frame, window frame, or wall perimeter
- Any exposed raw edge that needs protection from contact or a finished appearance
Its primary job is edge protection and a clean finish. For inside corners, outside corners, panel-to-panel seams, and ceiling transitions, see our aluminum trim molding profiles — rigid aluminum trim handles those transitions more cleanly than flexible vinyl.
Handling Corners
The vinyl trim is flexible but it will bunch at sharp 90-degree inside and outside corners if bent without modification. To turn a corner cleanly, make a small relief cut through the back flange of the U-channel at the corner point before you begin your run. A utility knife works best — score the back flange only, do not cut through the face of the trim. This allows the trim to fold flat around the corner without bunching or lifting as you press it into place.
Installation — Three Steps
Step 1 — Warm the trim. Before installation, warm the vinyl trim using a hair dryer or heat gun to make it more pliable and activate the adhesive inside the channel for a stronger, more consistent bond. Hold the heat gun or hair dryer at a safe distance and move it steadily along the trim — do not concentrate heat in one spot. The trim should feel warm and flexible to the touch, not hot. Do not overheat — the vinyl will deform if exposed to direct high heat at close range.
Step 2 — Cut relief notches at corners only. Before starting your run, identify any 90-degree corners and make a small relief cut through the back flange of the U-channel at each corner point using a utility knife. This allows the trim to fold cleanly around the corner without bunching. You do not need to pre-cut the trim to length — apply the full roll along the panel edge and trim the excess at the end once the run is complete. Heavy duty scissors, tin snips, or a utility knife all cut cleanly through the vinyl.
Step 3 — Press onto the panel edge. Starting at one end of the panel edge, center the U-channel over the edge and press firmly as you work continuously from one end to the other. The adhesive inside the channel bonds to the panel edge on contact. Apply firm, even pressure along the full length to ensure complete adhesion. Once you reach the end of the run, trim the excess with heavy duty scissors, tin snips, or a utility knife.
Compatible Panel Thicknesses
The vinyl U-channel slot is approximately .125" wide x .125" deep — designed to accept diamond plate panels up to .045" thick. Compatible with:
- ✅ .025" embossed aluminum diamond plate sheets
- ✅ .032" embossed aluminum diamond plate sheets
- ✅ .045" heavy duty aluminum diamond plate sheets
- ❌ .063" heavy duty sheets — use aluminum J-trim edge cap instead
- ❌ .125" heavy duty sheets — use custom seam covers instead
Not sure which thickness you have? Compare all diamond plate sheet thicknesses here.
Available Finishes
Available in two finishes to match your diamond plate panels:
| Vinyl Trim Finish | Best Paired With |
|---|---|
| Polished | Polished (High Polish Silver) diamond plate sheets |
| Gloss Black | Gloss Black diamond plate sheets — also widely used with Dark Metallic Gray sheets for a sharp contrast finish |
Note: Dark Metallic Gray vinyl trim is not available in this product. Many customers finishing Gray diamond plate panels choose Gloss Black vinyl trim for a clean contrasting edge — it is a popular and great-looking combination.
Vinyl vs. Aluminum Trim — Choosing the Right Profile
| Vinyl U-Channel Trim (This Product) | Aluminum J-Trim Edge Cap | |
|---|---|---|
| Material | Flexible vinyl | Rigid extruded aluminum |
| Installation | Press-on — adhesive pre-applied inside channel | Slides over panel edge — secure with nails, screws, or adhesive |
| Curved surfaces | ✅ Yes — flexible | ❌ No — rigid, straight runs only |
| Panel thickness | Up to .045" | Up to .063" |
| Available Lengths | 50 feet per roll | 2', 3.5', 4', 6', 7.83', or 8' lengths |
| Corners | Relief cut required at 90-degree corners | Clean miter cut at corners |
| Cost | Most economical option — lowest cost per linear foot | Available in multiple lengths — see product page for pricing |
| Best For | Curves, budget installs, minimal seams, fast application | Straight runs, corners, premium finished look |
Specifications
| Material | Flexible vinyl |
| Profile | U-channel with pre-applied adhesive inside channel |
| Roll Length | 50 feet |
| Slot Width | Approximately .125" |
| Slot Depth | Approximately .125" per side |
| Compatible Panel Thickness | Up to .045" |
| Finish Options | Polished | Gloss Black |
| Cutting Method | Heavy duty scissors, tin snips, or utility knife |
| Installation Method | Press-on — adhesive pre-applied, no additional fasteners required |
| Warming Recommended | Yes — hair dryer or heat gun before installation |
| Availability | Retail only — not available at wholesale |
Complete Your Diamond Plate Installation
- Aluminum J-Trim Edge Cap — For straight panel edge terminations on panels up to .063" thick — available in 2', 3.5', 4', 6', 7.83', and 8' lengths
- Aluminum H-Seam Splice Molding — For joining two panels at a vertical or horizontal seam
- Inside Corner Trim — For finishing panels at 90-degree inside corners
- Outside Corner Trim — For finishing panels at 90-degree outside corners
- Diamond Plate Screws — DeWalt Wall-Dog anchors for securing panels to drywall, wood, and metal studs
- 3M 550 Construction Adhesive — For a completely fastener-free panel installation
Flexible. Self-adhesive. 50 feet. Clean edges from start to finish.
| Weight | 3.5 lbs |
| Dimensions | 12 × 4 × 4 in |
| Color | Polished, Gloss Black |
| Length | 50' |