

Diamond Plate Vinyl Wrap Film - Peel & Stick | Polished & Black | 24" Wide Rolls
Diamond Plate Vinyl Wrap Film - Peel & Stick | Polished & Black | 24" Wide Rolls
Couldn't load pickup availability


- About This Item
- Product Data Sheet
The Diamond Plate Look — On Any Surface, Without Aluminum Panels
Real aluminum diamond plate sheets are the best choice for walls, trailers, and structural applications. But not every project needs — or can accommodate — real metal. The OnlineDiamondPlate.com Diamond Plate Vinyl Wrap Film brings the diamond plate look to virtually any smooth surface using the same professional-grade pressure-sensitive adhesive vinyl film used by sign shops, wrap installers, and commercial display companies worldwide. Peel the backing, position the film, squeegee it smooth, and the transformation is immediate and durable — indoors or outdoors.
No power tools. No screws. No freight shipping. No dock or forklift required. Just a roll of vinyl, a clean surface, and a squeegee.
What Customers Use It For
The diamond plate vinyl wrap film is as versatile as the surface you want to transform. Common applications include:
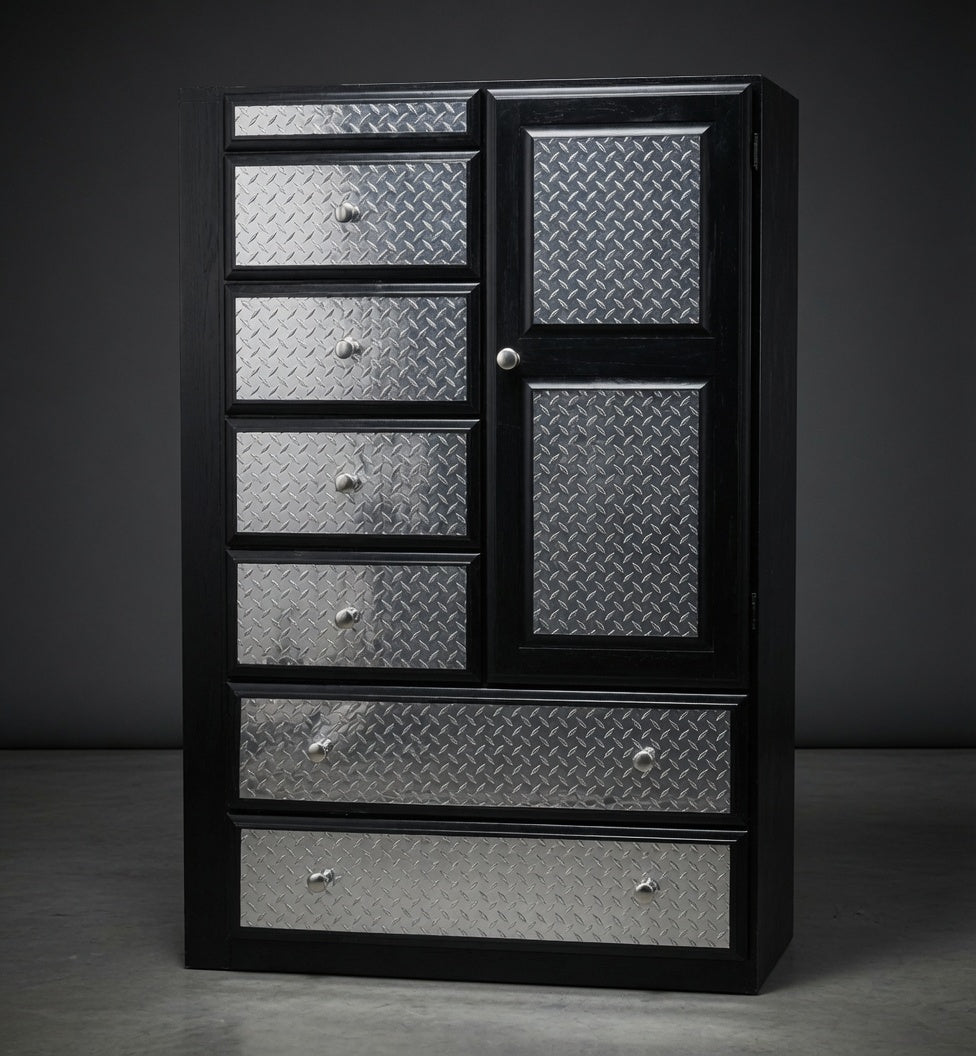
- Kitchen and garage cabinets — wrap cabinet door faces for an industrial diamond plate look without replacing the cabinets
- Switch plates and outlet covers — cut to size and wrap existing plastic covers for a diamond plate finish that matches your wall panels
- Toolboxes and storage units — wrap metal or plastic toolbox surfaces for a custom shop look
- Retail displays and trade show booths — fast, removable diamond plate finish on display surfaces and counters
- Furniture accents — table tops, drawer fronts, shelving faces, and custom furniture projects
- DIY crafts and custom builds — anywhere you want the diamond plate aesthetic on a budget without real metal
- Vehicles — interior panels, dash accents, bumper covers, and exterior accent panels
- Walls and wainscoting — a lightweight, tool-free alternative to aluminum diamond plate panels for light-duty decorative applications
Vinyl Wrap vs. Real Aluminum Diamond Plate — Choosing the Right Option
Both products deliver the diamond plate look. Choosing between them depends entirely on your project requirements:
| Diamond Plate Vinyl Wrap (This Product) | Aluminum Diamond Plate Sheets | |
|---|---|---|
| Material | Printed vinyl film — not real metal | Genuine aluminum — real metal |
| Installation | Peel and stick — no tools required | Screws, nails, or construction adhesive |
| Weight | Negligible — film only | 5.7 lbs (2'x8') to 60.8 lbs (4'x8' heavy duty) |
| Impact Protection | Decorative only — no structural protection | Genuine impact and abrasion resistance |
| Surface Flexibility | Any smooth surface — cabinets, plastic, glass, metal | Walls, framing, trailers, structural applications |
| Indoor / Outdoor | Both | Both |
| Custom sizing | Cut to any shape with scissors or utility knife | Custom straight cuts via industrial shear |
| Best For | Cabinets, toolboxes, crafts, displays, accents, DIY projects | Walls, trailers, floors, stairs, structural use |
Not sure which is right for your project? Order a sample kit — it includes both a real aluminum diamond plate sheet sample and a look at our full product lineup so you can compare in person before committing to a full order.
Available Sizes and Finishes
| Finish | Width | Available Lengths |
|---|---|---|
| Polished | 24" | 10', 20', or 30' |
| Gloss Black | 24" | 10', 20', or 30' |
All rolls are 24" wide — wide enough to cover a standard cabinet door face, a full toolbox lid, or a wainscoting accent strip in a single piece with no seam. For larger surface areas, plan your seams before cutting and allow for a small overlap at each joint.
Custom lengths are not currently available. Choose the roll length closest to your project requirement and cut to size on site — any excess stores flat and can be used for future projects or smaller accent pieces.
How to Apply — Step by Step
This vinyl uses a professional-grade pressure-sensitive adhesive — the same type used by sign shops and wrap installers. It does not have air-release channels, which means once it contacts the surface it bonds immediately. Taking a few minutes to prepare correctly makes the difference between a clean professional result and a frustrating redo.
What You Will Need
- Clean lint-free cloth or paper towels
- Isopropyl alcohol (70% or higher) for surface cleaning
- A plastic squeegee, credit card, or similar flat rigid tool for smoothing
- Sharp scissors or a utility knife for trimming
- A second pair of hands for larger pieces — highly recommended
Step 1 — Prepare the Surface
Clean the application surface thoroughly with isopropyl alcohol and a lint-free cloth. Remove all dust, grease, wax, and fingerprints. Any contamination trapped under the vinyl will be permanently visible as a bump or cause the vinyl to lift over time. Allow the surface to dry completely before proceeding. Apply in a temperature between 60°F and 85°F for best adhesion — cold adhesive does not bond well and hot surfaces cause the film to stretch during application.
Step 2 — Measure and Cut
Measure your surface and cut the vinyl to size using sharp scissors or a utility knife. Add approximately 1" of extra material on all sides — it is always easier to trim excess after application than to deal with a piece that falls short. For irregular shapes such as switch plates and outlet covers, cut a rough oversized piece first, apply it, then trim to final shape with a sharp utility knife after the vinyl is adhered.
Step 3 — Use the Hinge Method for Large Pieces
For pieces larger than about 12" in any direction, use the hinge method to maintain control during application:
- Position the cut vinyl piece face-down on a clean surface and peel back approximately half of the backing paper. Fold the exposed backing under itself so the adhesive is facing up but not yet touching your surface.
- Position the vinyl over the surface with the backing still on the lower half. Align carefully — once the adhesive touches the surface it bonds immediately.
- When aligned, press the top half down firmly starting from the center and working outward with your squeegee to push out air. Work slowly and methodically.
- Once the top half is fully adhered, lift the bottom half slightly, peel the remaining backing away, and squeegee the bottom half down the same way — center outward.
- Finish by firmly squeegeeing the entire surface one final time to fully activate the adhesive bond.
Step 4 — For Small Pieces
For small pieces such as switch plates, outlet covers, and accent pieces under 12", simply peel the entire backing at once, align carefully, and press down firmly from center to edges with your squeegee or fingertip. Work slowly enough to avoid trapping air under the center of the piece.
Step 5 — Trim and Finish
Trim any excess vinyl with a sharp utility knife using a straight edge as a guide. For curved edges, use scissors. Press all edges down firmly with your squeegee or fingernail to ensure full adhesion at the perimeter — lifted edges are the most common failure point on any vinyl application.
Pro Tips
- Never apply in direct sunlight — the surface gets hot, the adhesive activates too fast, and the vinyl stretches as you work
- Work indoors in a dust-free area — static charge on the vinyl attracts dust particles that get permanently trapped under the film
- If you get a bubble — carefully lift the vinyl back to the bubble, smooth it flat, and re-apply. Do not try to push a bubble out from the center of an already-adhered piece — you will stretch the film
- For curves and corners — use a hair dryer or heat gun on low heat to warm the vinyl and make it more pliable before pressing it around curves and into corners
- For outlet covers and switch plates — apply the vinyl flat first, then use a sharp utility knife to cut out the switch or outlet opening from behind the cover
Specifications
| Material | Professional-grade pressure-sensitive adhesive vinyl film |
| Pattern | Printed diamond plate pattern |
| Finish Options | Polished | Gloss Black |
| Roll Width | 24" |
| Available Lengths | 10', 20', or 30' |
| Indoor / Outdoor Rated | Yes — both |
| Air Release Channels | No — use hinge method for pieces over 12" |
| Application Method | Dry application — peel and stick |
| Cutting Method | Sharp scissors or utility knife |
| Custom Lengths | Not available — fixed at 10', 20', and 30' |
Complete Your Diamond Plate Project
- Aluminum Diamond Plate Sheets — Real aluminum panels for walls, trailers, and structural applications
- Diamond Plate Switch Plates & Outlet Covers — Real aluminum diamond plate cover plates for a permanent finished look
- Diamond Plate Corner Guards — Real aluminum corner protection for inside and outside wall corners
- Diamond Plate Sample Kit — See every finish and trim profile in person before ordering — $4.99 with free shipping
The diamond plate look. Any surface. No tools. No freight. Just peel, apply, and done.
| Weight | N/A |
| Dimensions | N/A |
| Length | 10', 20', 30' |
| Width | 12, 24 |